Industrialised Cinematography

How The Lego Batman Movie was Lit & Rendered on an Ambitious Schedule Whilst Maintaining the Highest Aesthetic Standards
Introduction
The Lego Batman Movie (TLBM) was created at Animal Logic in Sydney, Australia over about two and a half years from zero (no script) to delivery in January 2017. With a production crew of 494 at maximum, this extremely ambitious schedule was met without compromising on quality. Apart from the incredible talent and commitment of everyone involved, this achievement was possible due to a production approach that emphasised industrialisation.
This article will focus on my department, Lighting, though naturally since we don't exist in splendid isolation there will be plenty of reference to the work of other departments.
I've covered the general principles of cinematography as it pertains to our feature animation work in my articles on our previous CG features The Lego Movie (TLM) and Legend of the Guardians (LOTG), so rather than reiterate these principles I'll focus on points that differentiate the cinematography of TLBM from TLM, as well as a high-level survey of some of the workflow and pipeline initiatives we implemented to enable our crew of 40 lighters and compositors to meet what at times seemed like an impossible deadline.
A Quick Overview
This FXGuide article gives a generalized (and necessarily limited) overview of the complexities of making TLBM. and the following video supplements the article:
Brief & Creative Goals
Director Chris McKay (CMK) had previously acted as Co-Director on The Lego Movie, which meant in practice that he was located in Sydney at our studio working day by day with our crew, so he knew us well and understood the way we worked at a deep level. He is also very familiar with the idiosyncrasies of working in a Lego universe. Additionally, he is well-versed in Batman lore, being a huge fan, and wanted to make a film that honoured the legacy of Batman whilst parodying it in a good-natured way. At the same time he wanted to respect The Lego Movie's legacy whilst exceeding it in scope and ambition. CMK's pitch to Warner Bros was that he wanted to make "Jerry Maguire as if directed by Michael Mann with lots of jokes" - a film with humour and heart.
Our Lighting brief was to make a plausibly photorealistic movie that exceeded the splendour of The Lego Movie in both beauty and complexity.
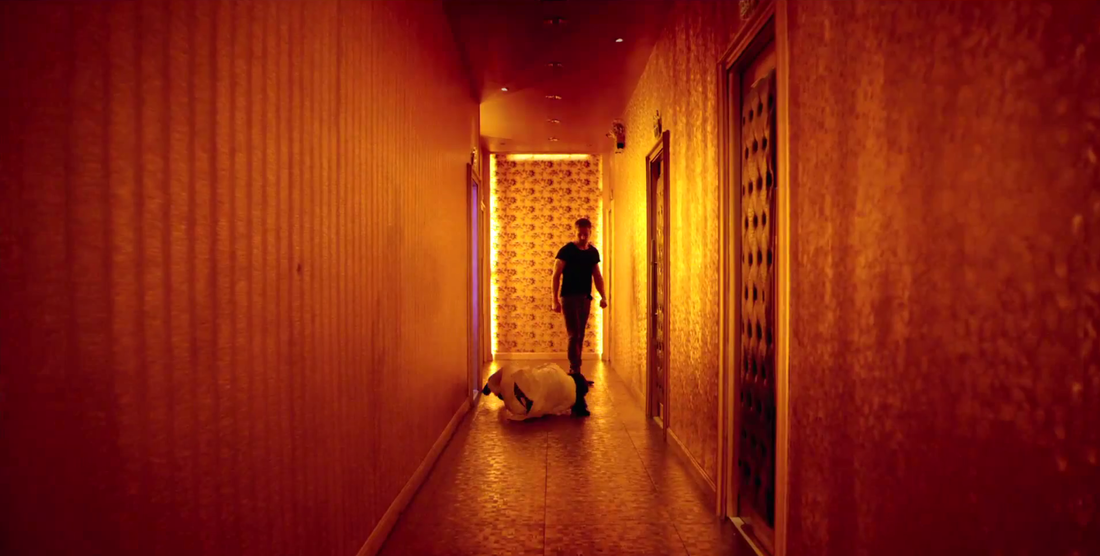
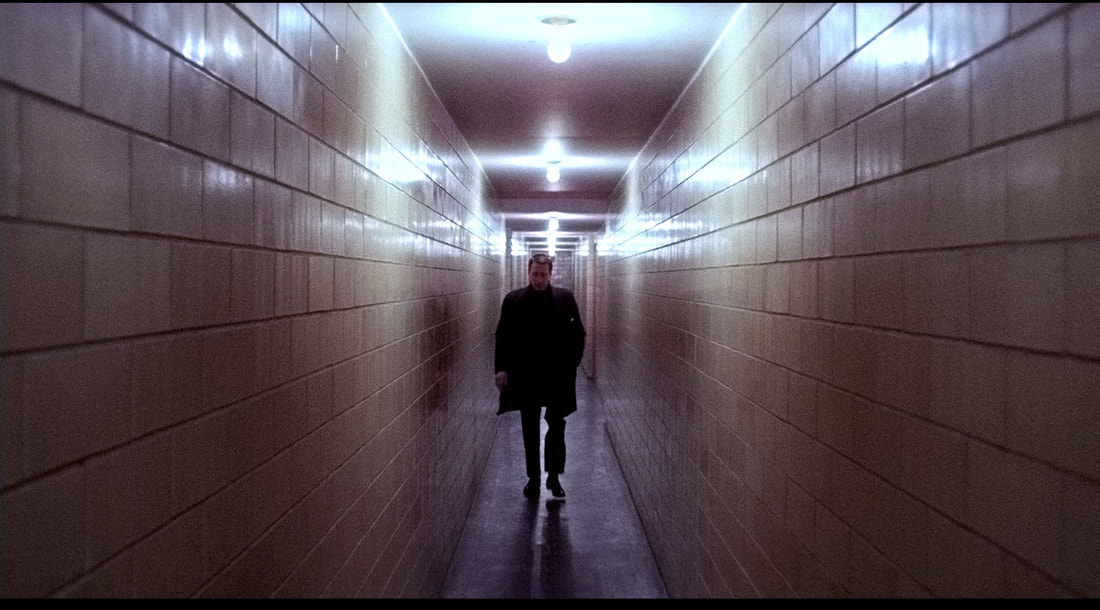
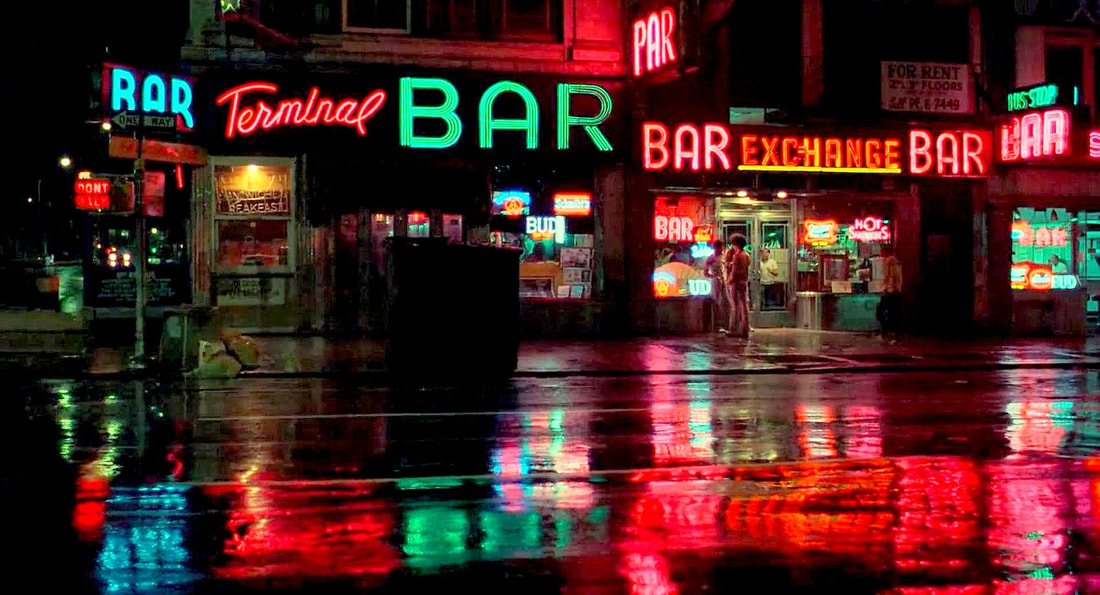
In our initial discussions, Gotham City's look was inspired by the grainy, bleached look of 70s classics such as Taxi Driver, The French Connection and Serpico. Batman's city was gritty and grim, a city with an endemic crime problem that not even Batman could really make a dent in. At that point in the development of the film's story Joker, through his evil machinations, manages to be elected Mayor of Gotham City. He transforms, or "Jokerfies", the city. Visually this was to be clearly delineated from the dreary, gritty look of Batman's Gotham, with a brighter, more saturated faux-happy candy-colour look, something along the lines of Charlie and the Chocolate Factory.
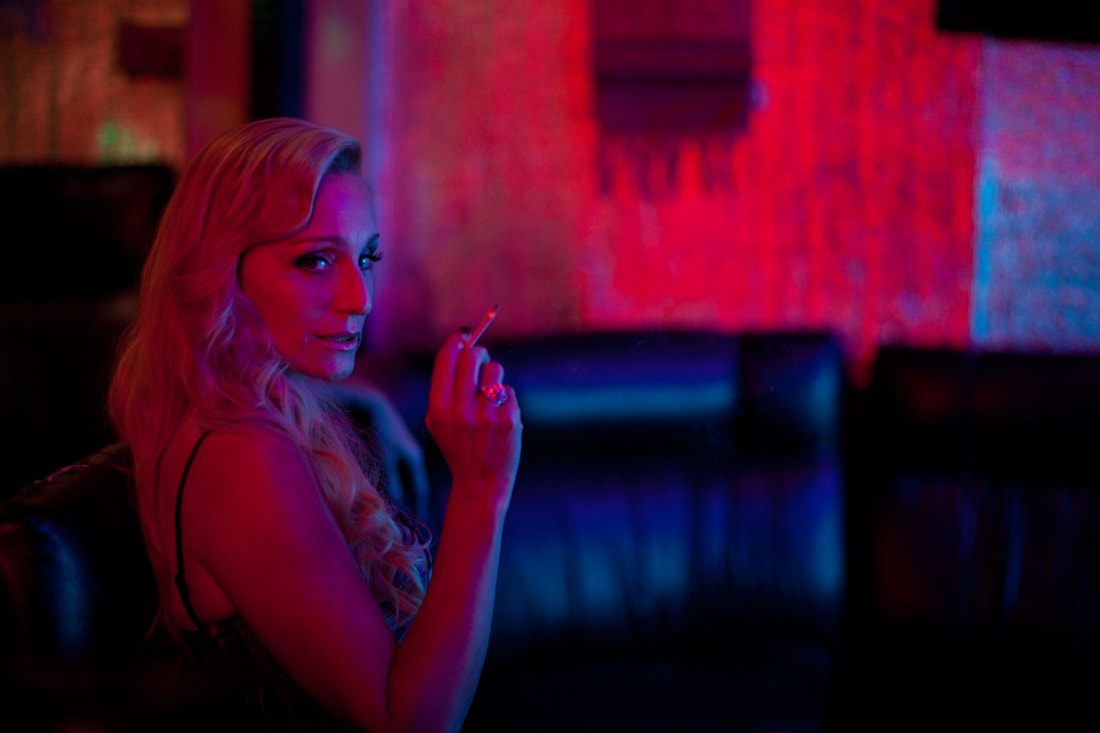
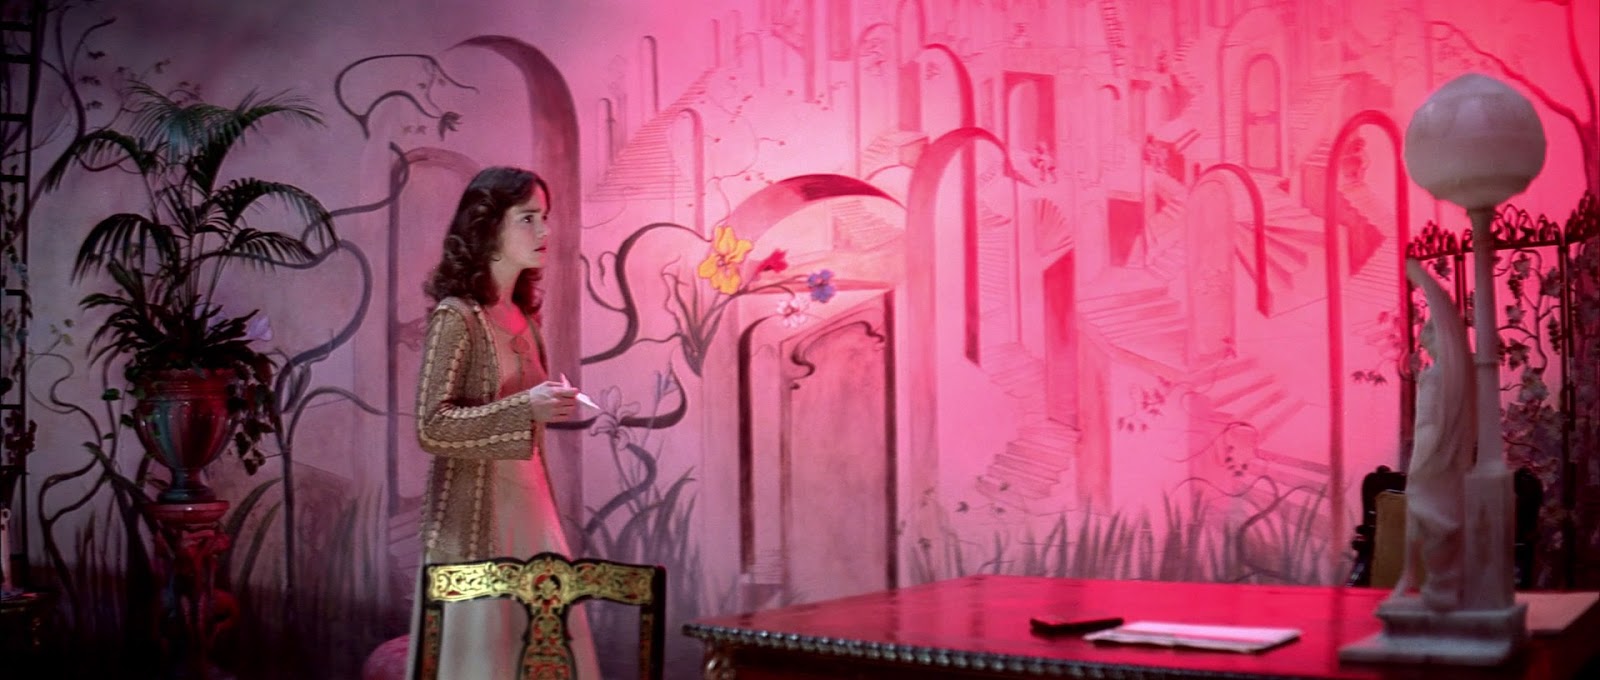
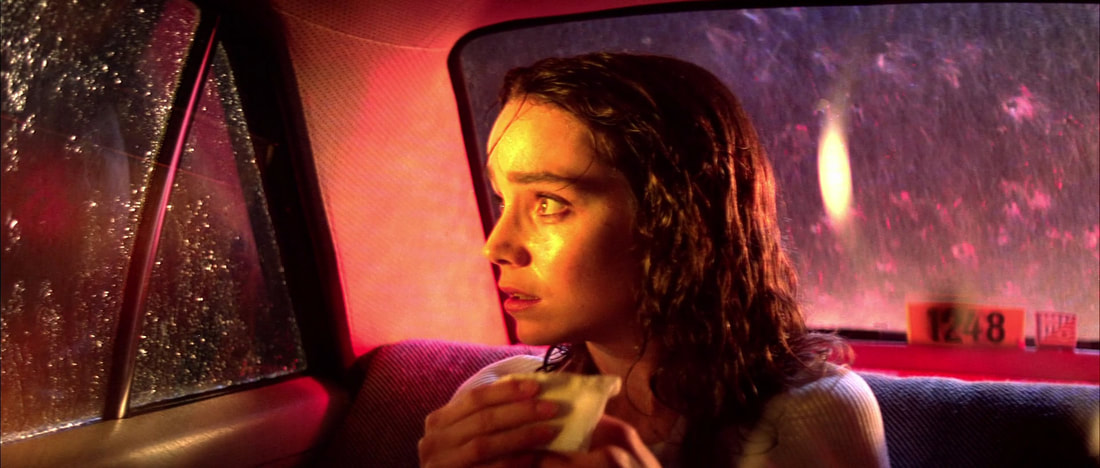
As the story matured, Joker no longer became Mayor, and the discussion about the look evolved into the concept of a film noir with supersaturated colours.
In a Post Magazine interview, Colourist Sam Chynoweth describes the look:
“We ended up coining the phrase ‘baby’s first apocalypse’: dark and gritty and Gotham-like, but all the bits that could be made fun would be fun, and anything that could be turned up was turned up to 11. Our motto all the way through was ‘enhance, enhance!’”
In Lighting, we called the heavy colour treatment "Baturation", and joked that we were working in CMKY colourspace (i.e. CMK why?).
Since the look was to be heavily "worked", it was obviously a departure from true photorealism. However, almost all films that are lensed "photographically" undergo image manipulation in post, often very heavy manipulation, so as ever we used "photorealism" as a point of departure and planned for a post-heavy process in Comp and Digital Intermediate.
Visual References
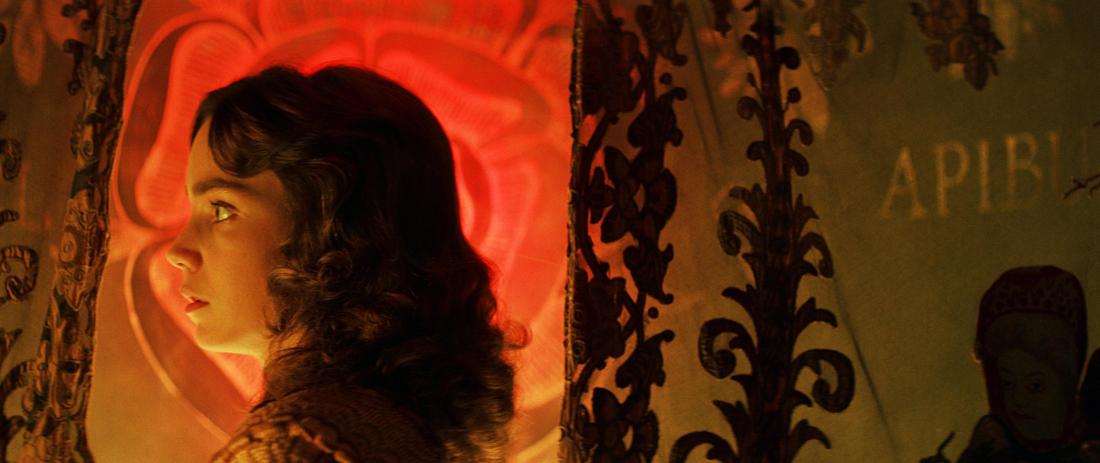
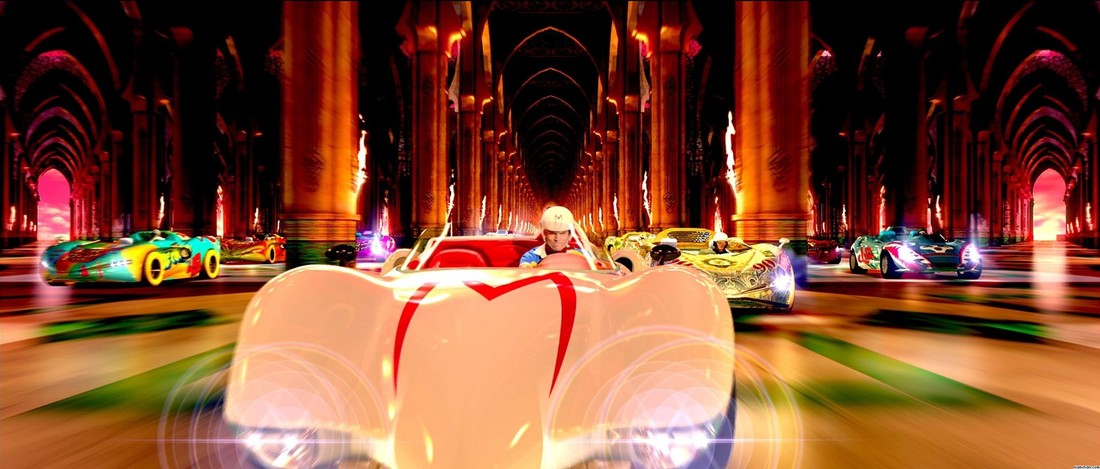
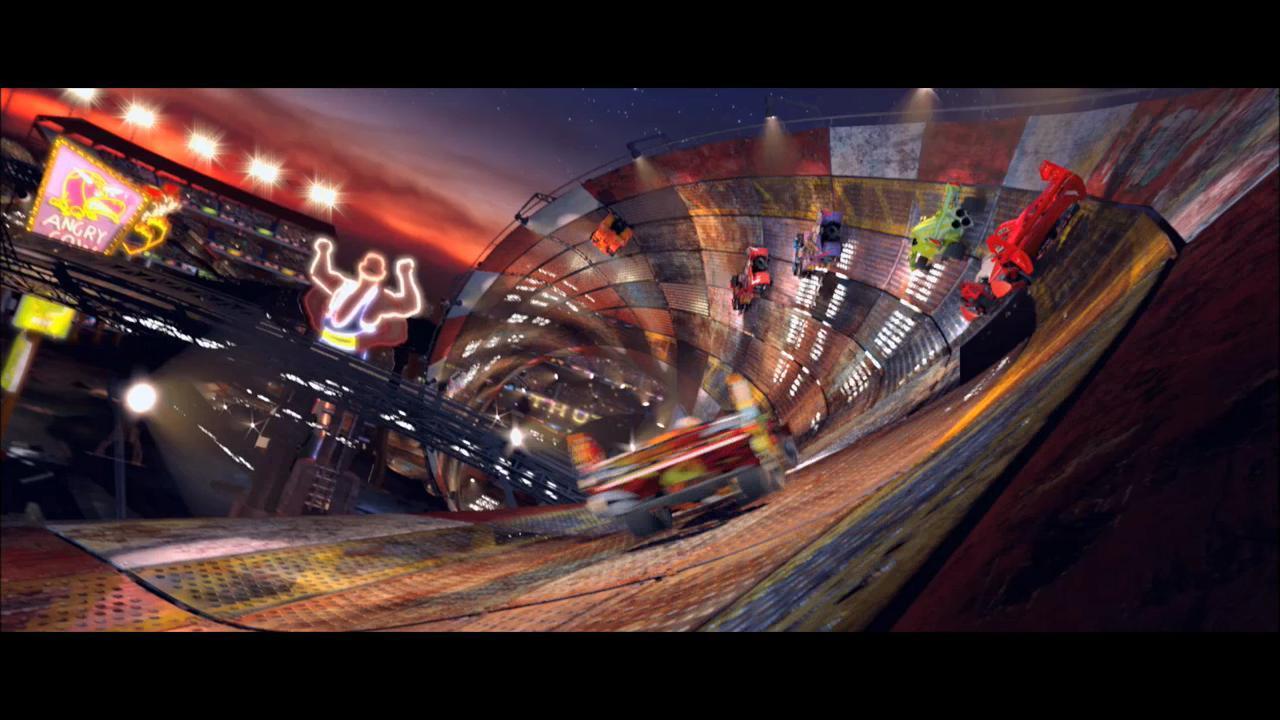
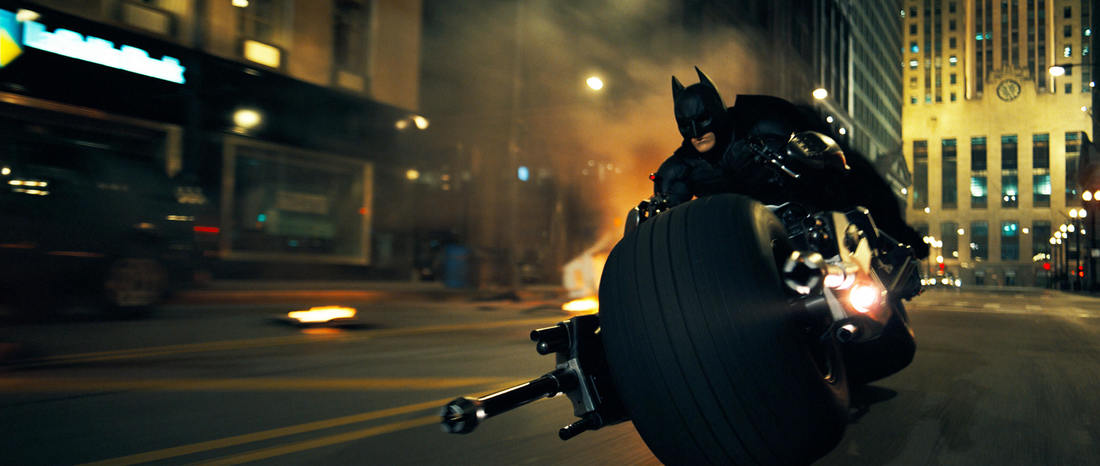
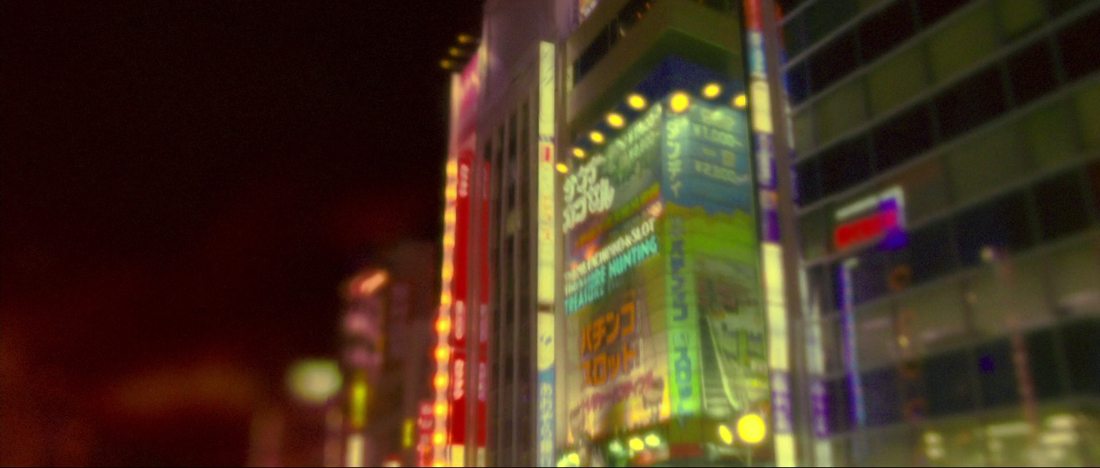
Our conversations about film and other visual references was extensive and eclectic. Here's a tiny subsample....Click "Play" to start the slideshow:
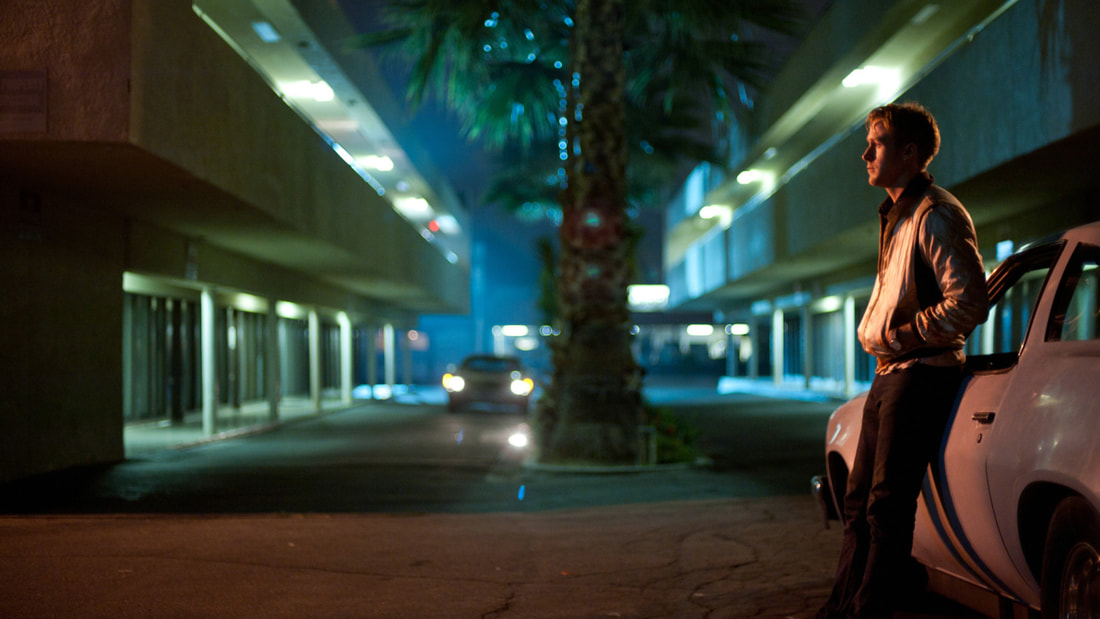
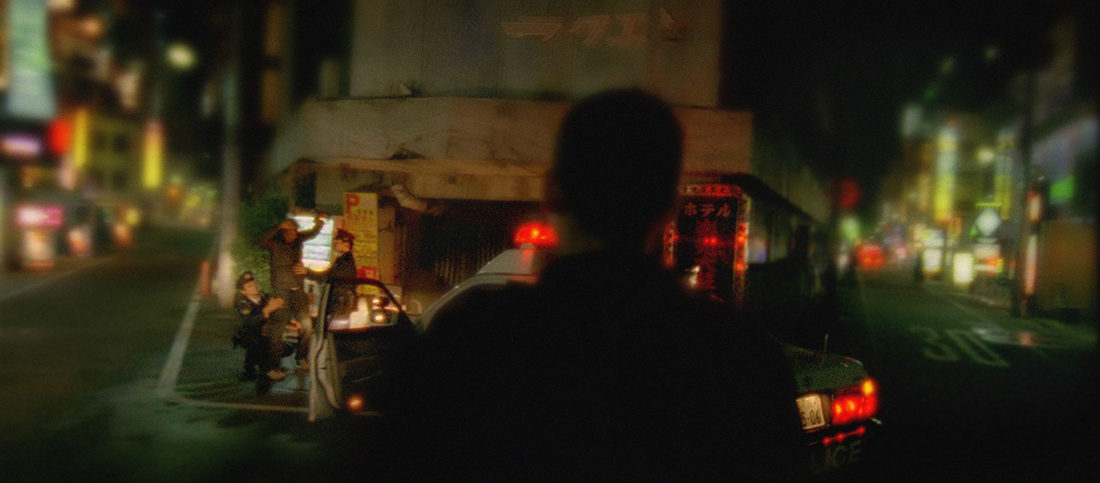
A very small selection of colour, mood, focus and lighting reference that formed part of our discussions about the cinematography and colour grading of TLBM:


Research
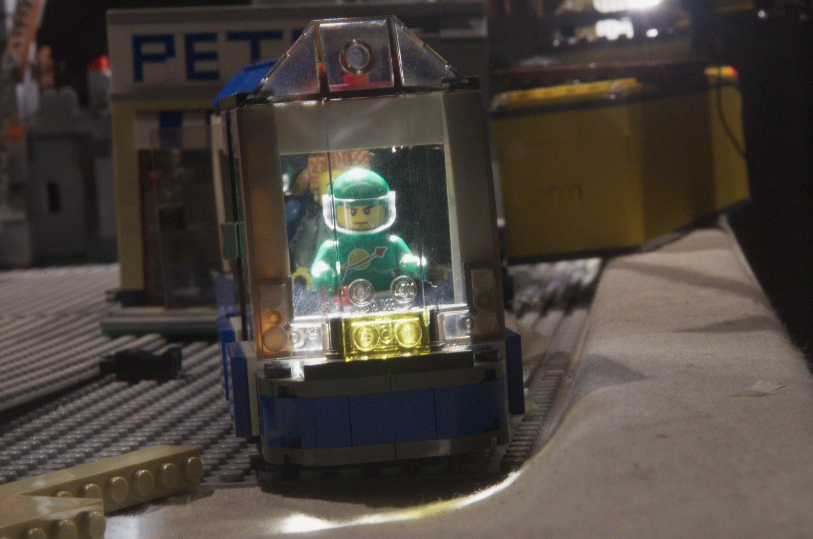
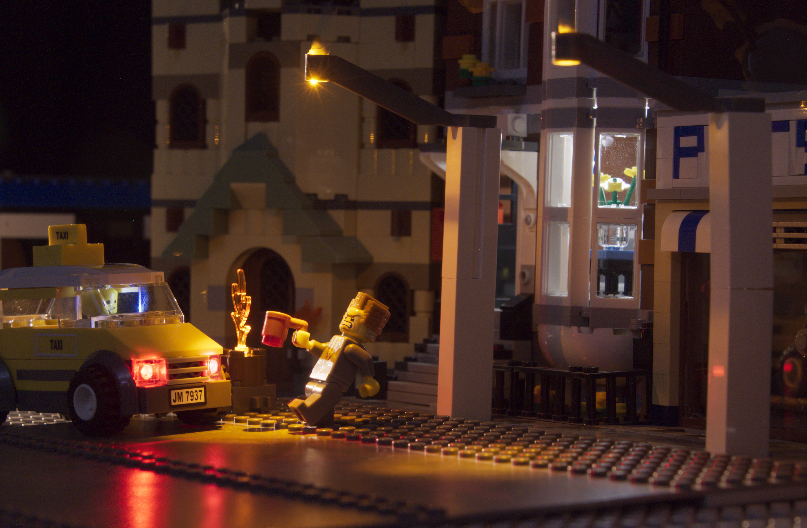
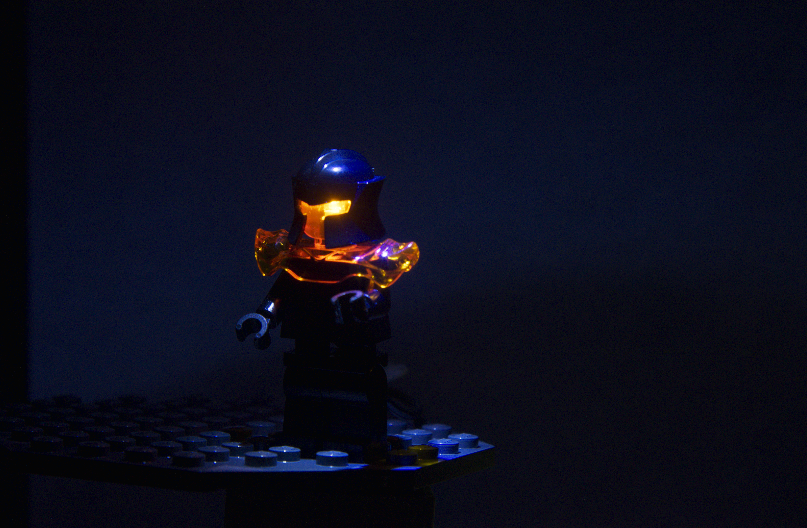
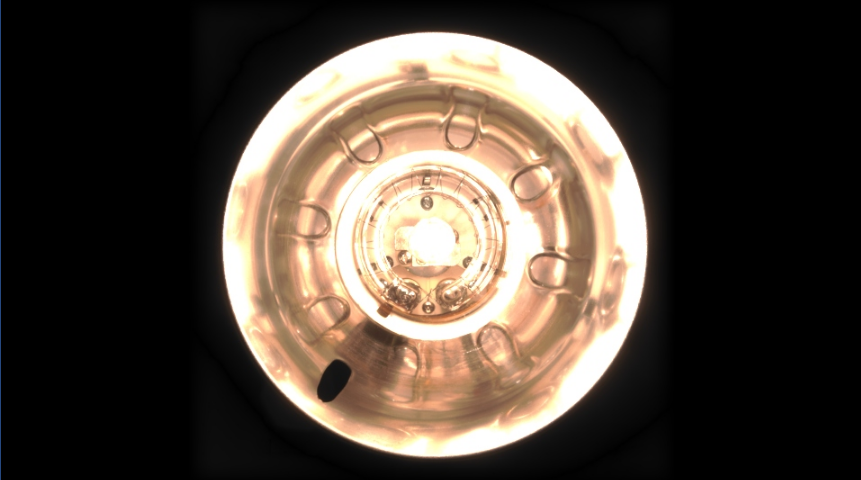
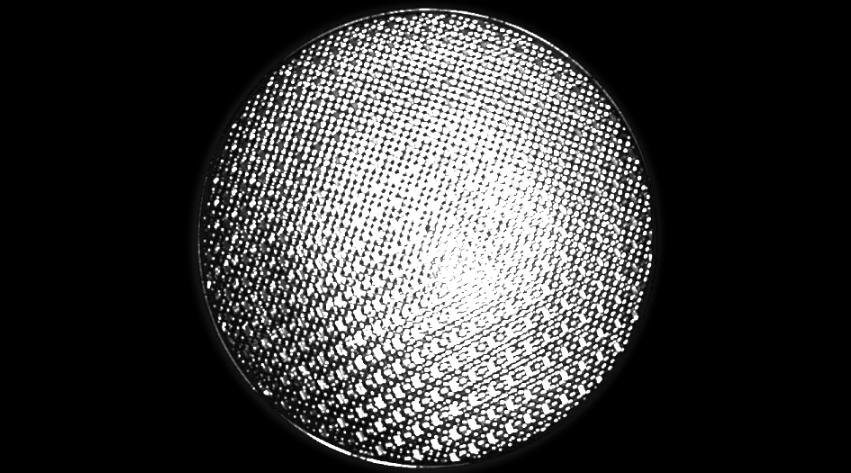
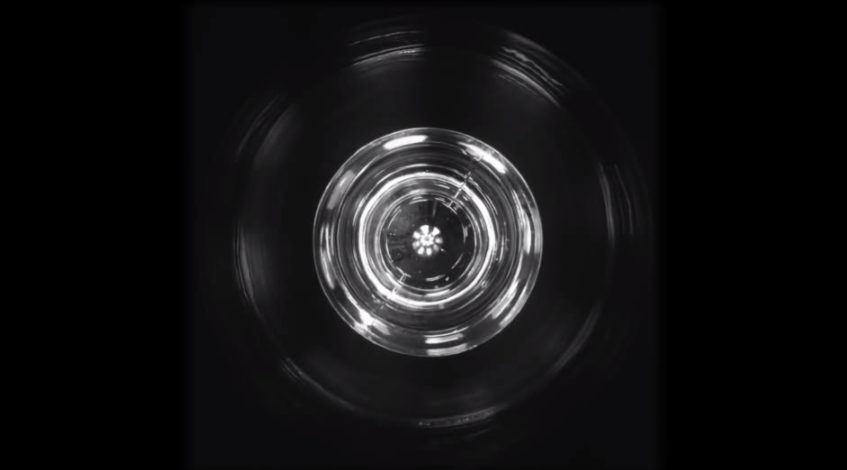
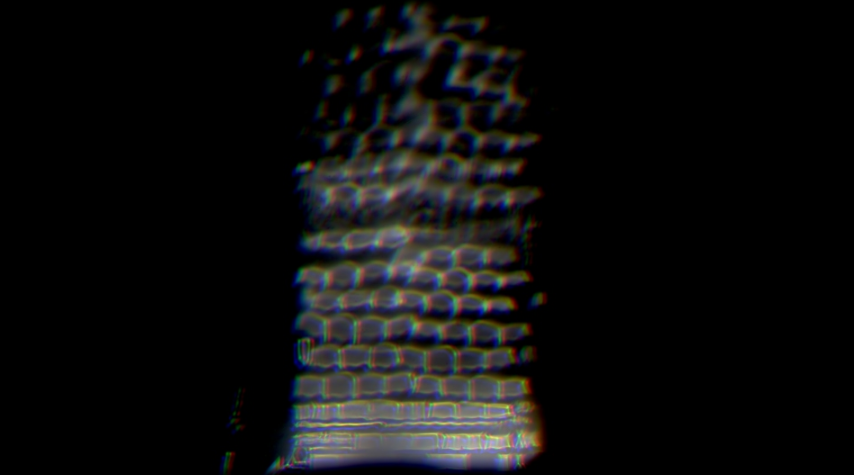
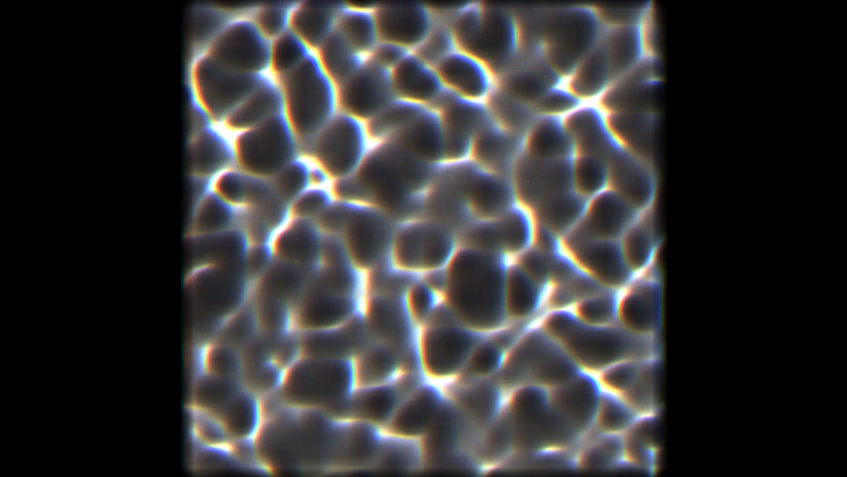
As usual we did a lot of visual research, photographing Lego bricks, buildings, minifigs and vehicles under a wide variety of lighting conditions. Physical effects such as fire, water, and smoke were video'd and photographed with Lego. We filled a fishtank with water and placed Lego sets and minifigs in the tank, then poured particulate matter into the water and captured the result on slow motion video to emulate a snow storm. We burned and melted minifigs (kids - don't try this at home!) and captured the results at various frame rates.
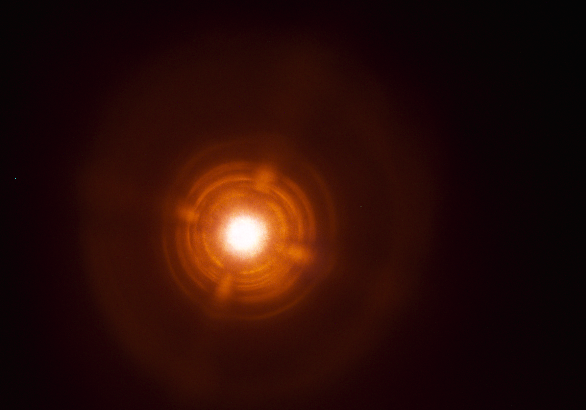
We put LED lights in Lego vehicles and studied the resultant photos. We also examined the caustic effect of light reflecting off Lego plastic, and the patterns of light cast by various light types, and much more.
A large number of light fittings were photographed in high dynamic range (HDRI) - these were then available in a library to be applied to our CG lights as "gobos" to create the impression of physical lights illuminating the scene.


Rendered Depth of Field
Once The Lego Movie was complete I did an ergonomic assessment of the tasks that were the heaviest burden on the Lighting and Compositing teams. A lot of time was spent on implementing Depth of Field (DOF) in comp using depth data generated as part of the rendered image outputs. Generally, time was spent mitigating artifacts inherent to the process (for example weird edges on objects and characters, especially if they were in the foreground and there was a large variation in focus between foreground and background). Rack focus shots could be a particular challenge.
A standard approach was to separate out objects at different focal planes into layers and render them as separate elements. Although this made applying depth of field in compositing easier, it involved a heavier burden of scene and data management.
A standard approach was to separate out objects at different focal planes into layers and render them as separate elements. Although this made applying depth of field in compositing easier, it involved a heavier burden of scene and data management.
Here is an example test image with 2D DOF artifacts highlighted. A considerable amount of work (and artist time) would be required to clean up this image.
Sometimes the only way to deal with bad DOF artifacts was to alter the DOF, typically making it less shallow by a stop or two. This may have helped us get shots across the line, but it involved stepping away from the DOF intent established by the Director and the Lensing Director in Layout.
These insights led me to the idea of rendering our depth of field in our proprietary renderer, Glimpse, rather than implementing DOF as an inherently problematic and time-consuming comp process. Practical benefits aside, we were also confident of obtaining superior visual results, including a creamy, organic look unblemished by weird edge artifacts, a procedural bokeh kernel (the effect of which could vary across the lens in response to distortion and other anomalies), and seamlessly smooth focus pulls. Some of these targets still are in development, but we had a very acceptable suite of DOF functions in Glimpse that were used on this film and on The LEGO Ninjago Movie.
(Before someone asks, yes we did consider a deep compositing solution, but our decision came down on the side of rendered DOF for a bunch of reasons I can't go into here).
"Render Everywhere"
Glimpse is now used as the renderer for reviews of every department at Animal Logic (albeit with different integrators depending on the review requirements). The implementation of rendered DOF meant that depth of field was reviewable in any department's review renders once a shot had its camera parameters established in Final Layout. This meant that there were multiple opportunities to assess DOF and alter or tweak it before a shot was viewed in Lighting Dailies, resolving concern that we would be required to render many iterations of a shot in order to tweak DOF settings. This is an argument that was made against baking DOF into 3D renders, the assumption being that it is more efficient to turn iterations in Compositing. In actual production we were able to easily turn iterations via re-rendering for the handful of occasions when DOF was required to change, and the time-saving of a rendered approach to DOF was evident.
Rendered DOF was not quite a free ride, however. Use of mattes became problematic because even though our mattes participated in the DOF blur and could thus theoretically be used cleanly, the reality of DOF blur is that many pixels comprising an image cannot be fully attributed to one object or another. This innate ambiguity results in visual anomalies, which manifest more the harder an artist tries to affect the image via a matte.
Another popular technique involves the use of pMattes, which are generated from positional data at render time. These give an artist the ability to isolate objects in depth. The positional data used by pMattes blurs with DOF, which then makes the data ambiguous, so when using rendered DOF their use is limited to obtaining soft, imprecise effects to avoid artifacts, whereas in a 2D comp DOF workflow their effect is applied to unblurred pixels prior to the application of DOF to the image.
These limitations meant that much of the subtle work traditionally done with these techniques was pushed back into the 3D space via use of blockers etc., although some tools were developed to allow blockers and pMattes defined in Nuke to be recreated in the lighting scenes, which helped streamline the process.
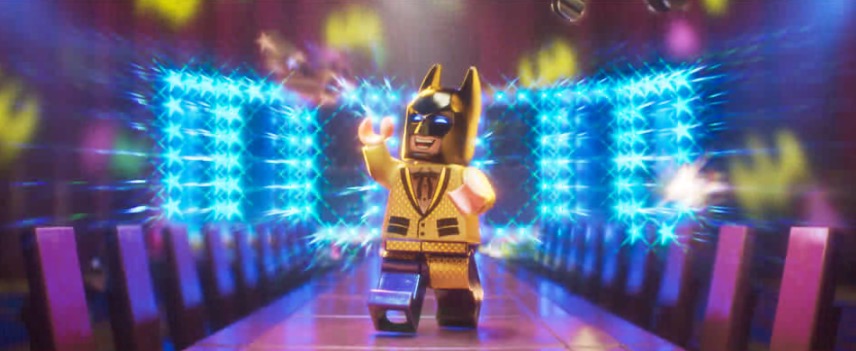
2D DOF had some limited use in TLBM where it was dramatically desirable to have an artistic bokeh kernel, since in Glimpse the procedural kernel cannot (yet) accept an image as its basis. For example, during the Gala sequence Bruce Wayne sees Barbara Gordon for the first time and falls instantly in love. We enhanced this moment with dreamy shallow DOF with a heart-shaped bokeh kernel, which was achieved with our traditional 2D DOF process.
Rendered DOF was not quite a free ride, however. Use of mattes became problematic because even though our mattes participated in the DOF blur and could thus theoretically be used cleanly, the reality of DOF blur is that many pixels comprising an image cannot be fully attributed to one object or another. This innate ambiguity results in visual anomalies, which manifest more the harder an artist tries to affect the image via a matte.
Another popular technique involves the use of pMattes, which are generated from positional data at render time. These give an artist the ability to isolate objects in depth. The positional data used by pMattes blurs with DOF, which then makes the data ambiguous, so when using rendered DOF their use is limited to obtaining soft, imprecise effects to avoid artifacts, whereas in a 2D comp DOF workflow their effect is applied to unblurred pixels prior to the application of DOF to the image.
These limitations meant that much of the subtle work traditionally done with these techniques was pushed back into the 3D space via use of blockers etc., although some tools were developed to allow blockers and pMattes defined in Nuke to be recreated in the lighting scenes, which helped streamline the process.
2D DOF had some limited use in TLBM where it was dramatically desirable to have an artistic bokeh kernel, since in Glimpse the procedural kernel cannot (yet) accept an image as its basis. For example, during the Gala sequence Bruce Wayne sees Barbara Gordon for the first time and falls instantly in love. We enhanced this moment with dreamy shallow DOF with a heart-shaped bokeh kernel, which was achieved with our traditional 2D DOF process.
Realistic Lens Artifacts & Distortion
It's a dead giveaway that an image has been computer generated if it exhibits none of the anomalies that characterise images produced by even the best physical lenses. An audience member may not be able to put this into words, but years of absorbing lensed content will have trained them subconsciously to accept certain visual defects as constituting "real" lensing, and they will be similarly sensitive to the absence of defects and feel that an image is "artificial" if defects are absent. This is likely to affect the "suspension of disbelief" that allows an audience member to accept the constructed reality and be consequently more invested in the story.
On The Lego Batman Movie we wanted to "feel the glass" - that is, to construct a photographic "reality" that implied that we had filmed real Lego pieces with physical lenses.
On The Lego Batman Movie we wanted to "feel the glass" - that is, to construct a photographic "reality" that implied that we had filmed real Lego pieces with physical lenses.
Lens distortion
On The Lego Movie, lens distortion was applied in DI, and little attempt was made to ensure fidelity to real-world lenses, it was more just an effect that roughly emulated the phenomenon of anamorphic lens distortion.
For TLBM we decided to approach lens distortion more authentically, starting with implementing it in our Glimpse renderer, rather than by applying it as a post-render process.
The first step was to do research in order to identify lenses from which to derive distortion parameters. We settled upon Panavision C series lenses. These lenses are not available for hire in Australia, but we were able to source test images filmed with Panavision C series lenses of various focal lengths. These images were analysed using Nuke and 3DEqualizer and simplified distortion parameters derived. No attempt was made to derive more complex parameters such as curvature or quartic distortion values. The goal was to signal the use of physical lenses, rather than literally implement a scientifically accurate lens model.
We had test images for focal lengths from 35mm to 100mm, and extrapolated values down to 17.6mm anamorphic (equivalent to 10mm Super 35) and up to 352.3mm (equivalent to 200mm Super 35).
The implementation of lens distortion in Glimpse introduced the problem of vertical disparity, where discrepancies in stereo right and left "eyes" result in viewing discomfort, particularly in the corners of an image with visual features that more or less align with the top and bottom of the frame, such as the horizontal rows of floor tiles in Batman's home cinema in the slideshow below.
For a while this was dealt with manually (actually one dude, our indefatigable Comp Supervisor Alex Fry, did the manual work for all affected shots) by producing a disparity pass, zeroing out the x component and warping the y component to re-align the errant pixels. The inconvenient bottleneck of Mr Fry, indefatigable and dapper though he was at all times, led us to embrace the philosophy du jour, industrialisation, and have vertical disparity correction run as an automated post-render process on our render farm.
Our "Render Everywhere" approach meant that, as with DOF, the review renders of all production departments exhibited the same lens distortion. Amongst other things this meant that framing could be correctly assessed by Animation and Layout to ensure correct placement of objects and characters and to optimise dramatic performances, without nasty surprises down the line as was occasionally the case with the old system of post-render lens distortion.
Lens flares
Realistic lens flares were considered an important component of our "feel the glass" approach to lens emulation. On previous shows there had often been a manual approach to the generation of lens flares, for example using Video Copilot in After Effects, or laborious processes involving exporting locators indicating light positions from Maya in order to drive flare generation in Nuke. Manual approaches such as these are cumbersome and did not fit in with our industrialised approach.
Compositing Supervisor Alex Fry developed an automated flare system where each pixel of the final composited image contributed to a lens flare layer according to its intensity. This was then delivered to Digital Intermediate as part of the "layerpack" and applied during the grading process. A flexible design meant that a "B flare" layer could be requested for some special purpose (to emphasise a dramatic lightsource, for example) and sent through to DI.
The following video shows some shots from "Lego Batman" in the top panel with their flare layer in the lower panel, followed by some technical studies:
LensFX
Similar to the LegoLens developed for TLM, a suite or kit of LensFX tools was implemented for TLBM in a Nuke node called the GothamLens. The kit included effects such as anamorphic vertical blur and chromatic aberration, as well as an optional Liberace effect which generated star-shaped flares to bling up a couple of fun sequences that emphasised the immaturity of Batman and his alter ego, Bruce Wayne.
The Liberace lensFX at work in the "Tuxedo Dressups" sequence of "The Lego Batman Movie"
Lens gags
Who knew lensing could be funny? Eagle-eyed cinematographers and lens geeks may have spotted some lensing Easter eggs in TLBM. Imagine the hilarity as we dreamed up this split-field diopter gag, for instance:
Production Realities
"LEGO Ninjago [due out at the end of [2017] was actually supposed to come first, but they weren’t ready, so they asked us to move up our release date. We made this movie in about two and a half years, which is literally from no script to finished product. It’s definitely one of the most aggressive schedules for an animated movie that there’s ever been." - CMK quote from Den of Geek interview
As with most productions of this scale, the schedule was extremely ambitious, very compressed and intense. The earlier-than-planned kickoff of the production of TLBM, as indicated by CMK in the quote above, meant that project development, including Story and R&D, ran parallel with production in a highly fluid process.
CMK and the writers and Story Department worked hard to iterate the story even as we were making the film. Although this process was hardly stress-free, we reaped dividends from the nimble, flexible, responsive pipeline and industrialised workflow that we had implemented over the course of previous productions and continually strive to improve. We could deal with anything thrown at us and provide great service, allowing the story to develop as required (to make the best film possible) without being constrained overly by production limitations.
An industrialised Lighting pipeline meant that, in my Department at least, the response to story changes and shot additions at short notice was a laconic "yeah, we can do that" followed by some bids that translated my assumptions about efficiencies into Production-palatable numbers. Then my crew of awesomely talented, hard-working lighters and compers could crank out the shots, not quite without breaking a sweat, but with minimal overtime and weekend work. The bulk of the film was actually made in the last three months of production. At peak, the Lighting and Comp crew in the week of Nov 21 2016 final'd 183 shots, representing 9.71 mins of screen time.
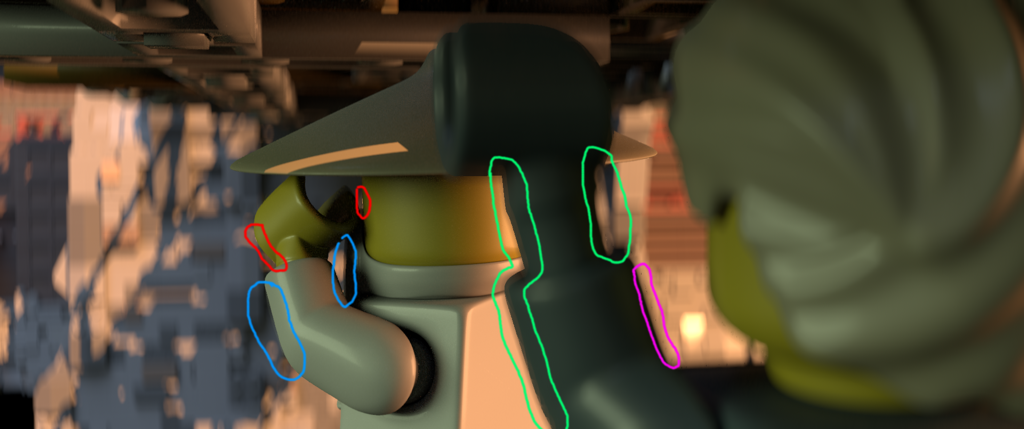
An example of the accumulation of different "lightgroups" to create a composited lighting shot.
How We Did It
The general principle that guides our lighting workflow is to automate wherever possible. Repetitive tasks are best handled by machines, leaving artists with more time to spend being creative. Also important is the ability to re-use work done once multiple times, and to this end we have designed our pipeline around the concept of "global assets", of which more below.
Global Assets
"If work done once can be leveraged elsewhere, an efficiency dividend is obtained." This is the axiom at the core of our concept of "Global Assets". Instead of residing at the shot level (or even at the sequence level) assets such as lightrigs, RSS (Render Submission Scripts) and Nuke comp scripts & templates reside at the global level of the production, where they can be arbitrarily assigned via asset management tools to any number of shots.
The following flowchart illustrates this logic in respect of the assignment of a Keylight rig (a master light rig for a sequence). A "Lightrig" contains descriptions of the lights for a scene, their parameters and associations, and any geometry to be included (perhaps as a light blocker), amongst other things. In the flow chart below, the Keylight Rig for a theoretical Sequence "A" has been deemed to be useable as a starting point for the keylight work in Sequence "Q", which is staged in the same environment and at a similar time of day.
The following flowchart illustrates this logic in respect of the assignment of a Keylight rig (a master light rig for a sequence). A "Lightrig" contains descriptions of the lights for a scene, their parameters and associations, and any geometry to be included (perhaps as a light blocker), amongst other things. In the flow chart below, the Keylight Rig for a theoretical Sequence "A" has been deemed to be useable as a starting point for the keylight work in Sequence "Q", which is staged in the same environment and at a similar time of day.

A simple example of how a Keylight rig created for a given sequence and environment might be assigned to multiple dependent shots. Tweaks to the lightrig would certainly happen at the Minikey and new sequence keylight level, in which case they become new global assets. Production shots frequently modify the Keylight rig in some way (typically by simplifying it), and then are checked in as new global assets. Same-as shots use lightrigs unaltered.
Lights in Assets (LIA)
LIA are lightrigs that are associated specifically with an asset instead of a sequence or shot. One example of this would be the headlights on a car. In this instance a headlight lightrig would be checked in as part of the car asset and therefore accompany the car when ever it is needed. This helps maintain consistency over sequences and also avoids duplication of work.
In our industrialised workflow this not only makes sense in terms of pipeline efficiency, but for artist time management. The ebb and flow of inventory from Animation into Lighting means that Lighting artists are often "idle", particularly in the early phase of production. Look Development work such as LIA authoring can be assigned to keep artists productive, and to build a repository of these assets that can be summoned on demand for use in sequences and shots later when we are busy. This is one way to generate complexity in a lighting scene rapidly using LIA that have been pre-approved and are technically clean.
In our industrialised workflow this not only makes sense in terms of pipeline efficiency, but for artist time management. The ebb and flow of inventory from Animation into Lighting means that Lighting artists are often "idle", particularly in the early phase of production. Look Development work such as LIA authoring can be assigned to keep artists productive, and to build a repository of these assets that can be summoned on demand for use in sequences and shots later when we are busy. This is one way to generate complexity in a lighting scene rapidly using LIA that have been pre-approved and are technically clean.


A LIA turntable render of the Batmobile .
It's also possible to animate lights and/or the incandescent properties of shader materials and store that information as part of a LIA setup, for example this animated sign (below). Again, this work done ahead of shot production allowed artists to dress a set with interesting lighting features that the artists assigned to shots in that environment inherited "for free".
Comp Elements
The Mattepainting and Art departments also supplied elements (many of them animated) on 2D cards which could be placed in 3D space in a comp script or template to further add visual complexity to a scene.
Surfacing Help
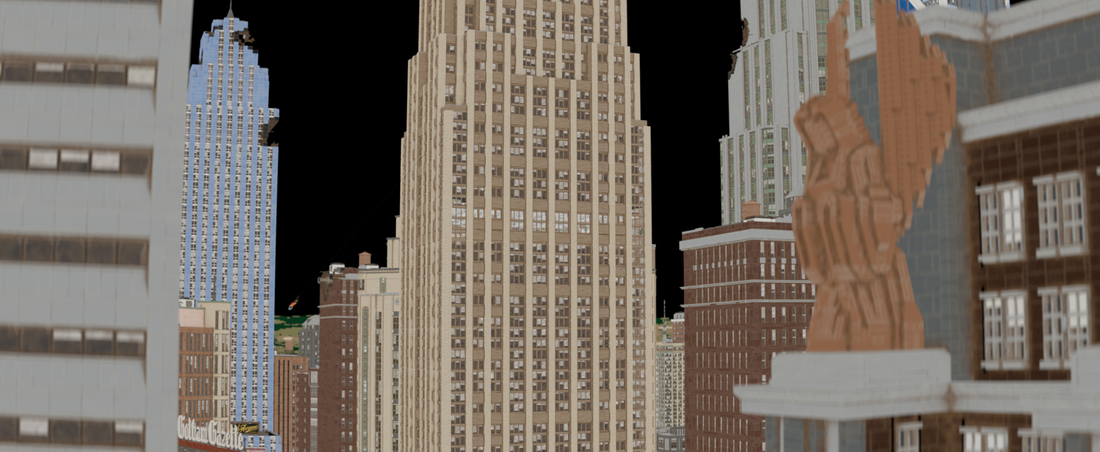
The Surfacing department helped us out a lot, for example by creating "rooms" seen through the windows of buildings in Gotham City that were apparently lit from within, and with variations such as randomised window shade positions. These held up well visually past middle distance and saved us from having to propagate tens of thousands more lights than were already required. The following surfaceColor image shows clearly the scale of the placement of randomised window shades in the city:
Propagation
Some of the huge sets in TLBM, such as the Batcave and Gotham City, required thousands of lights to be defined and accurately positioned. The Batcave, for example, has over 21,000 lights, which at times had to animate sequentially to show the Batcave "powering up", as in the example shot below:
Obviously placing this many lights manually was out of the question. A system called propagateObjects was devised, where interesting objects from the environment were loaded separately and a mini lightrig developed for each object. This lightrig then was kept as a single instance at the scene origin (zero 3D position).
A benefit of a Lego project is that any object is comprised of bricks that have a distinctive brickID number, shared by identical bricks. Taking advantage of this, at render time a Python script would run, and more or less would say "for every instance of this brickID in the scene, propagate the following lights with these predefined settings with these geometric offsets".
In this way, a very complex lighting scene could be created utilising this industrial process, and the lightrig could be kept streamlined with just a solitary example of each mini rig at scene origin.
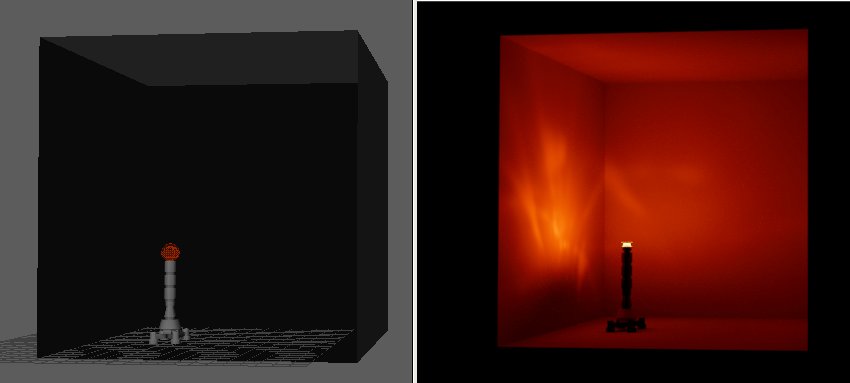
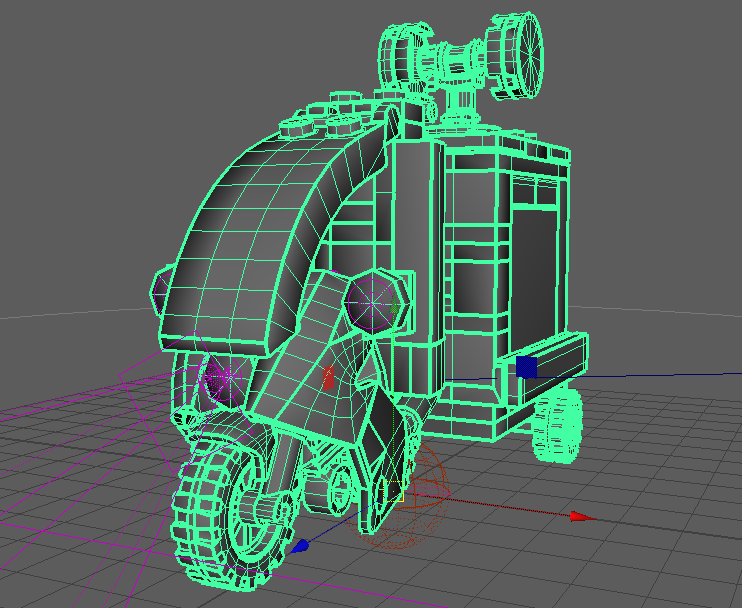
A mini light rig for a bollard being developed for use with propagateObjects. Left panel shows the rig in Maya, right panel shows an interactive Glimpse render where the effect of the light can be examined and any technical issues detected & corrected before checkin.
Deconstruction of a Gotham City shot that uses thousands of instances of propagateObjects, as well as LIA on the Batwing.
GSS Archives
As the project evolved, ways were devised to further optimise work done on large scale sets. For example large chunks of lighting work could be baked into an archive format native to our Glimpse renderer called GSS. In the spirit of industralisation, a process called tweakArchives was developed to allow a script to loop over lights baked into an archive and perform operations on them, for example grouping them for output as comp-adjustable lightgroups at render time, or randomising intensity as in the example below:
Randomising the intensity of hundreds of lights contained in an archive using "tweakArchives".
Tools
I've mentioned some of the tools we developed earlier, but I think it is worth highlighting a couple that were key to implementing a philosophy of industrialisation, enabling artists to more easily manage large amounts of data, to find useful information, and to assign global assets, amongst other things.
SILO
An acronym for Show Info/Load Objects, SILO is a tool for navigating, previewing and importing or updating the latest assets (such as render layers, comp scripts and cameras) in Nuke.
Additionally, it assists optimisation by displaying images designed to help analyse data, organises the viewing of render passes by render submission, allows examination of the associated RSS script, allows metadata to be queried, facilitates the migration of a Nuke script from one shot to another, and much more.
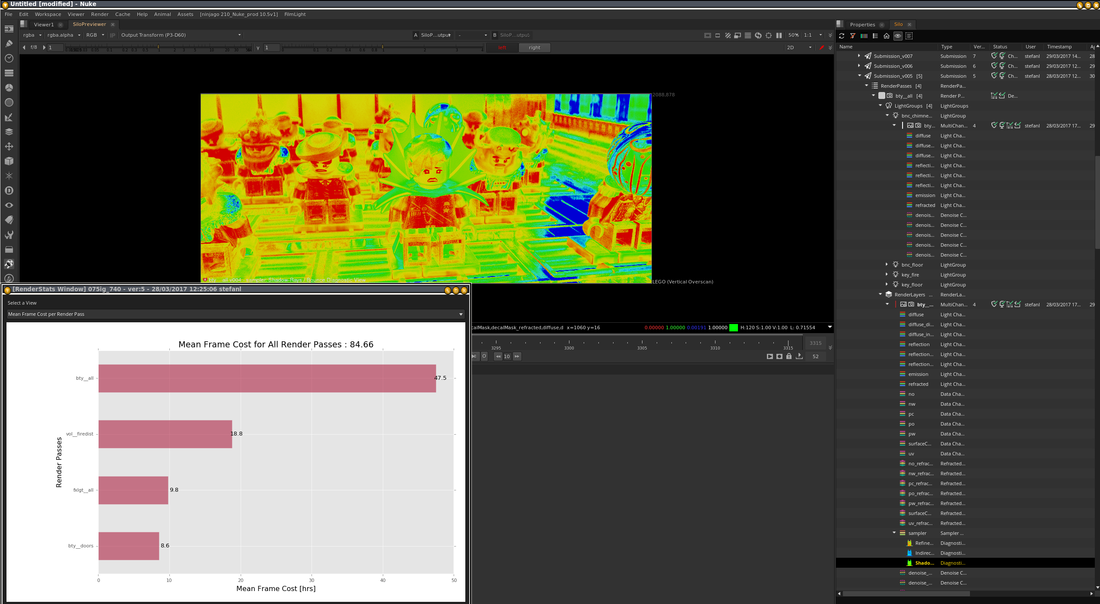
SILO screengrab. The coloured image is a data pass showing a heatmap representation of the number of shadow rays computed by Glimpse for this render layer, red being highest number - useful for an understanding of how the scene is being sampled. The right panel shows the various render submissions for the shot and their components, and the floating panel displays render statistics for the selected submission.
Lighting Asset Manager (LAM)
All would-be Lighting Artists dream of working in spreadsheets, right? Well, there is plenty of opportunity to do so, but we also recognise that it's a cumbersome and tedious process, which is why our magnificent team of Technical Directors came up with LAM, an interface for managing the assignment of global lighting-related assets.
All would-be Lighting Artists dream of working in spreadsheets, right? Well, there is plenty of opportunity to do so, but we also recognise that it's a cumbersome and tedious process, which is why our magnificent team of Technical Directors came up with LAM, an interface for managing the assignment of global lighting-related assets.
Render Explorer
An interface from which to control submissions to the render farm. Multiple shots from any sequence or combination of sequences can be submitted, with fine-grained control over how the submissions are made. For example
An interface from which to control submissions to the render farm. Multiple shots from any sequence or combination of sequences can be submitted, with fine-grained control over how the submissions are made. For example
- different quality settings
- complex framerange control
- the ability to delay submission until a specified time or event
- etc
LUX
Lux is a suite of tools which are primarily used for lighting-related tasks. Lux can run as an embedded app inside Maya or as a standalone application.
The idea of Lux is to have all tools that are required for lighting at the artist's fingertips in one place.
Lux is a suite of tools which are primarily used for lighting-related tasks. Lux can run as an embedded app inside Maya or as a standalone application.
The idea of Lux is to have all tools that are required for lighting at the artist's fingertips in one place.
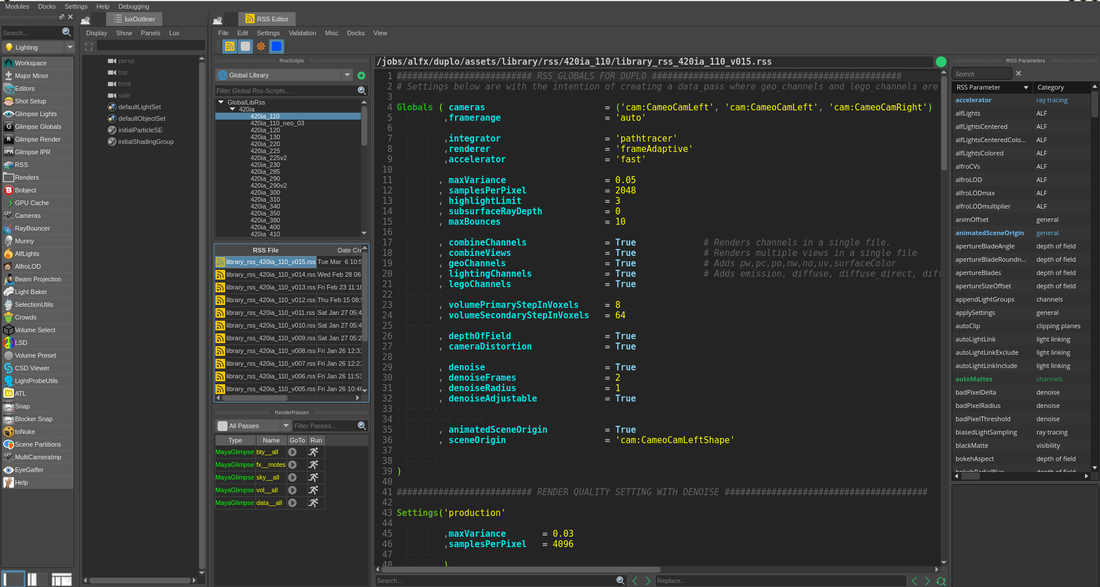
LUX screengrab showing RSS (Render Submission Script) editor in centre.
Glimpse
Animal Logic's proprietary renderer, Glimpse, is an essential part of our industrialised workflow, and warrants an entire suite of articles to do it justice.
For a more detailed look at Glimpse see this FXGuide article. Also, this interview with Max Liani, the original architect and developer of Glimpse, sheds some light on its early development and implementation on The Lego Movie.
What follows is a short summary of some of the benefits of Glimpse for our lighting workflow on TLBM. It's main benefit could be summed up thus: Glimpse made the production of TLBM possible.
Geometry Handling
Glimpse can handle massive amounts of geometry efficiently. This drastically reduces the burden of scene management for lighters, who no longer have to break complex environments into multiple layers in order to work within the memory limits of a render engine. Further efficiency is gained through the potential to create archives expressed in a format native to Glimpse, reducing the time needed to translate a scene prior to rendering. This can also help to speed up interactive lighting work, for example importing an archive of a building in order to do LIA work rather than the geometry of that building.
Thousands of Lights
It's one thing to be able to propagate thousands of lights throughout an environment, but it is critical that the computations required to render scenes of such lighting complexity do not result in production-crippling render times. Glimpse already had some of the required capability, for example clever built-in Multiple Importance Sampling, but the R&D team implemented further optimisations that significantly reduced render times.
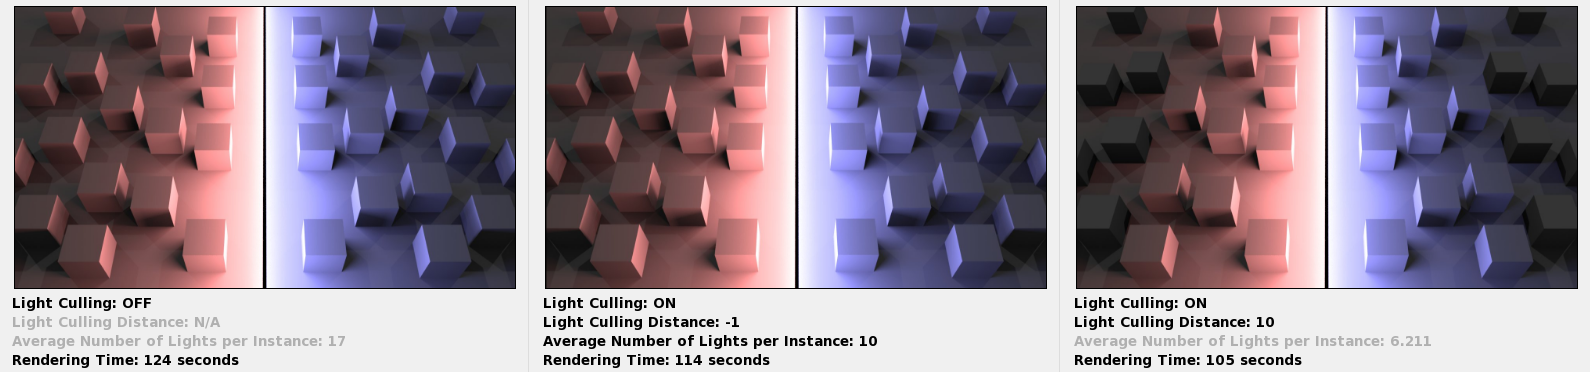
An important optimisation implemented was light culling, which restricts the effect of direct lighting by linking lights to instances of objects within a defined radius. To work at large scale, the lights and instances were partitioned using bounding volume hierarchies. Spatial grouping of instances allows Glimpse to relatively cheaply identify whether or not a large group of instances is affected by a light source, and spatially grouping lights means less computation at render time, and hence faster renders, for a relatively minor cost of additional memory used for storing the light group data. The implementation of light culling resulted in significant reduction in render times.
An important optimisation implemented was light culling, which restricts the effect of direct lighting by linking lights to instances of objects within a defined radius. To work at large scale, the lights and instances were partitioned using bounding volume hierarchies. Spatial grouping of instances allows Glimpse to relatively cheaply identify whether or not a large group of instances is affected by a light source, and spatially grouping lights means less computation at render time, and hence faster renders, for a relatively minor cost of additional memory used for storing the light group data. The implementation of light culling resulted in significant reduction in render times.
Comp Lighting Value Rollback via "Gradenode"
In the early days of work on a lighting shot, particularly for keylighting, it is desirable to rapidly iterate on the look of the shot in Nuke. For this reason we typically begin to render the shot with neutral "white" lights, and tweak colour and intensity in Nuke. Also, our Production Designer, Grant Freckelton established a "paintover" procedure where he worked on our lighting renders in Photoshop and produced images derived from actual renders that illustrated his creative notes. Starting with neutral lights gave him a free hand to be specific about colour without having to fight against colour inherent to the renders.
However, setting the intensity, and to a lesser extent colour, of lights in Nuke often reveals sampling issues in the renders which manifest as unpleasant noise in the image. This is because Glimpse samples the lighting scene based on the intensities of lights as represented at render time, and may not sample adequately enough in certain regions to allow for heavy manipulation by post-render processes.
A gradenode was developed in Nuke which allowed light values established in compositing to be "rolled back" into the lighting render by extracting the information as a chunk of Python code that could be incorporated into the RSS script that controlled the submission of the render to the Farm. Thus, at render time the lights had their parameters adjusted to match the creative decisions made in the iterative Nuke process.
What this meant was that Glimpse could efficiently sample the lighting scene with the "correct" lighting values, resulting in faster "convergence" (production of an image with a defined acceptable amount of noise) and better quality images. This became one of the "low hanging fruit" optimisations that enabled us to significantly reduce render times, while allowing us to maintain a flexible and nimble approach to our lighting work.
Denoise
Glimpse renders inherently contain a certain amount of noise or "variance", which looks like speckly grain or grit. This is because the mathematical realities of sampling mean that the renderer must "converge" on an amount of variance deemed to be acceptable (maxVariance) for the purposes of that particular render. The lower the maxVariance, the cleaner the resultant image, and the longer the convergence time (i.e. longer render).
Denoise techniques allow us to reduce render times by specifying a higher maxVariance that we are willing to accept, which means the render will converge faster. The tradeoff is more residual noise in the rendered image, which denoise techniques aim to clean up to an acceptable extent.
A suite of denoise techniques and tools were used on TLBM, but the tool most pertinent to an industrialised workflow is GlimpseDenoise, which ran automatically once a render was complete. This tool could spawn an entire article in its own right, so I'll just mention that using it with a specific flag in RSS meant that if the initial values set for the denoise process proved incorrect then reDenoise could be run with adjusted parameters without re-rendering the pass in question.
In addition to this automatic, adjustable process a raft of more manual techniques were used (most tailored to address specific types of noise or other render artifacts), including third-party plugin Neat Video, a technique to remove stray "bad pixels", and various projection, frameholding and blending techniques.
In combination these approaches to denoising allowed us to dramatically reduce render times in Glimpse, which became crucial as our delivery deadline approached and our Farm throughput requirements grew.
Targeted Development
Glimpse is proprietary and not available commercially. This means our limited R&D resources can be targeted to the requirements of our productions and development work scheduled accordingly.
Comp Team
Our small team of talented compositors became integral to our workflow. Here's a limited selection of their contributions:
- Certain types of Look Development, such as the aesthetic properties of the many screens in TLBM (TVs, billboards, control panel screens, the strangely distorted screens of the Phantom Zone, etc) were undertaken by Compositing and made available for use by Lighters (who mainly comp their own shots).
- Overflow work from Lighting was handled by Comp during crunch time. Sometimes a Compositor put the finishing touches on the majority of shots in a sequence, applying a recipe of look tweaks.
- Adding visual interest to shots, for example incorporating elements from Animal Logic's library of effects to augment fx elements without needing to loop a request back through other Departments. Also by positioning elements on cards in Nuke's 3D space to add complexity to shots, or projecting textures onto objects to sell a story point or to replace redundant signage (for example) without requiring new Surfacing work.
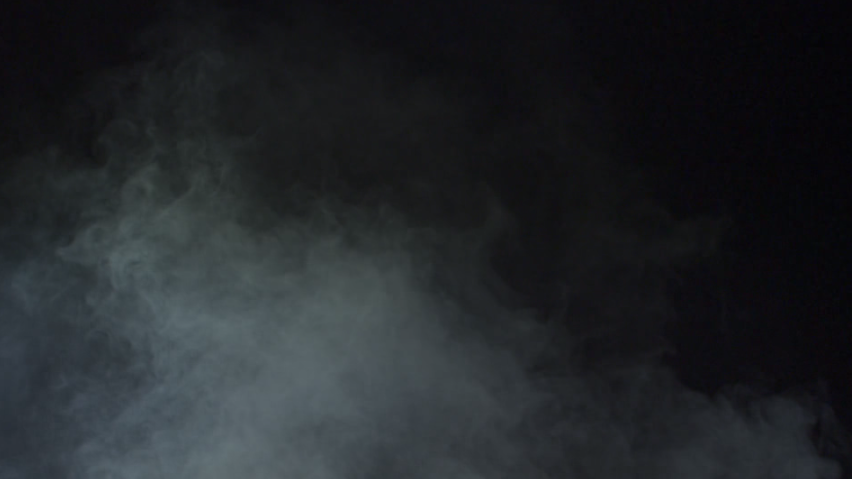
Example of a wispy smoke element from the effects library that might be used in Comp to add complexity to a shot.
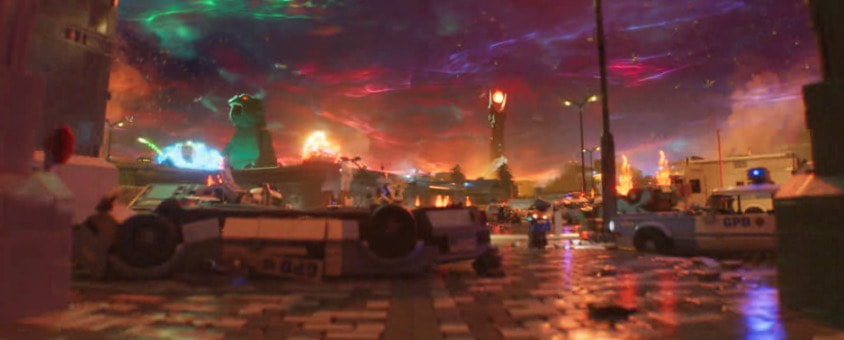
Deconstruction of a Phantom Zone shot. The appearance of the screens was Look Dev'd in Comp, and wispy smoke elements from the effects library that we nicknamed "juice" have been added to augment the rendered FX fluid simulation cache.
|
|
|
|
|
|
A selection of animated graphics examples created by Art Department used in Comp and/or Lighting to enhance the story or to add visual complexity.
Digital Intermediate
The Digital Intermediate (DI) process, also known as Colour Grading, is by now integral to our lighting workflow. This article from Post Magazine, featuring an interview with Animal Logic colourist Sam Chynoweth and editorial/DI engineer Bram Tulloch, takes a deep look at the process, so I will summarise the salient points here.
DI is not a post process on our animated features, but rather a part of the production workflow, and typically begins as soon as Lighting and Comp are producing viable images. On TLBM, there was extensive look development pursued in DI by Production Designer Grant Freckelton and the DI team.
Says colourist Sam Chynoweth (quoting from the Post Magazine article):
" From near the beginning of the project we were working with production designer Grant Freckelton to develop looks and we essentially became an extension of the lighting, compositing and output departments rather than just waiting for finished shots to be delivered to us."
This approach meant we could leverage the DI workflow to augment and complement the efforts made in Compositing, with shots requiring less iteration in Comp due to the ability to rapidly iterate in DI using pre-established "looks" as a baseline. The image manipulation in DI could be as granular as required thanks to our gradematte system.
A request from Lego was that, as much as possible, the "natural" colours of the Lego bricks be represented, especially for main characters, vehicles, and props. In the megastaturated lighting of TLBM this was obviously challenging, since strongly coloured light and heavy grading will skew the colour response of every surface shader in a scene. Where possible we addressed this in Lighting by strategically positioning neutral lights to "wash" parts of the scene. DI were able to assist by blending surfaceColor (an output of just the colour information of the shaders of the objects in a render) back in to the images, with nuanced control facilitated by grademattes.
There was a flexible system of "kickbacks" to Comp (and rarely to Lighting) if something more was required, and at the busiest times a compositing artist was stationed in the DI suite to generate or repair elements on demand - all part of the "industrialised cinematography" philosophy.
Cinematic Inspirations
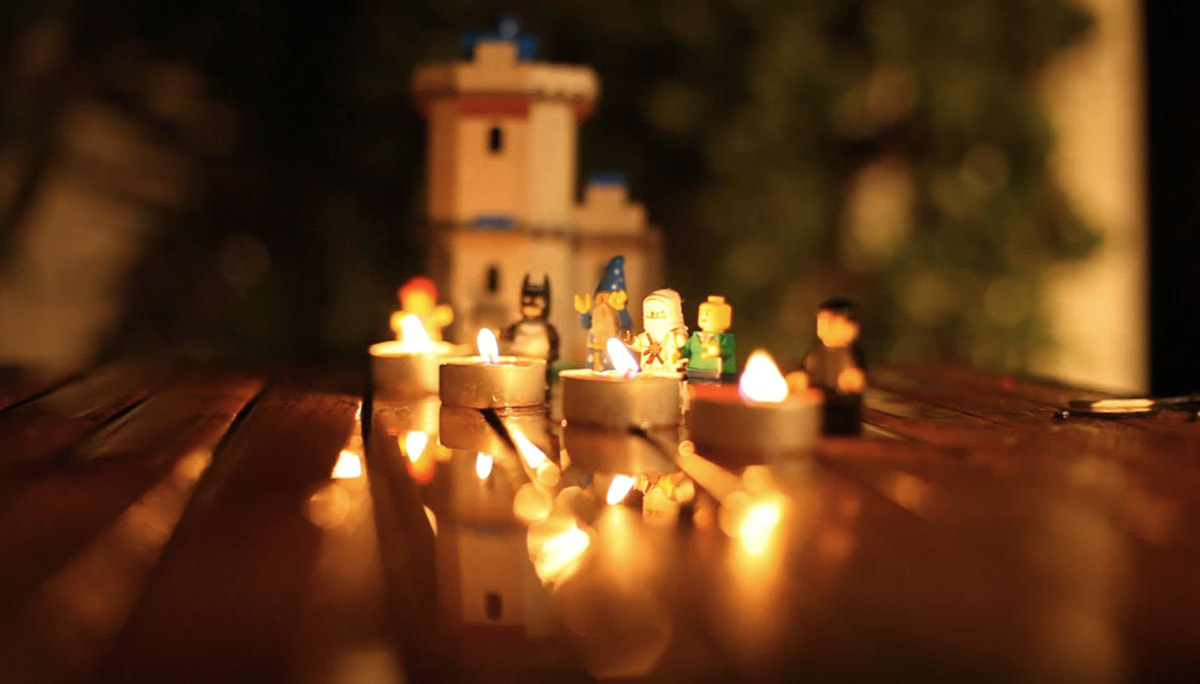
Part of the production process on animated features at Animal Logic is the "breakout" for a sequence, where the Director briefs key creative personnel and department supervisors on the dramatic intentions of a scene, and there is the opportunity to pitch ideas to the Director. I thought a fun way to wrap up this article would be via a slideshow representation of the thoughts behind a pitch I made to CMK which ended up being part of the lighting direction for Batman's introspective "Family Photos" sequence in Wayne Manor.
Click "play" to start the slideshow below:
Click "play" to start the slideshow below:
FUN FACTS
- Total number of crew who provided the CGI for the film: 494
- Total number of days spent animating the film: 9153
- Total number of years it would take for one person to animate the film: 25 years
- Total number of characters in the film: 451
- Biggest LEGO Character: Kraken, 111,284 Bricks
- 2nd Biggest LEGO Character: Sauron, 53,981 Bricks
- 3rd Biggest LEGO Character: King Kong, 35,405 Bricks
- Number of unique Bricks: 3,180 Bricks
- Number of unique Brick textures: 81,854 textures
- Number of Models in Gotham City: 41,605 models
- Most number of Model iterations: Robin, 31 versions
- Biggest Single LEGO Model: Wayne Manor, 34,287 Bricks
- Biggest LEGO-made landscape: 443,386 Bricks (energy facility earthquake/split set)
- Biggest LEGO vehicle Model: Bat Cargo Plane, 15,739 Bricks
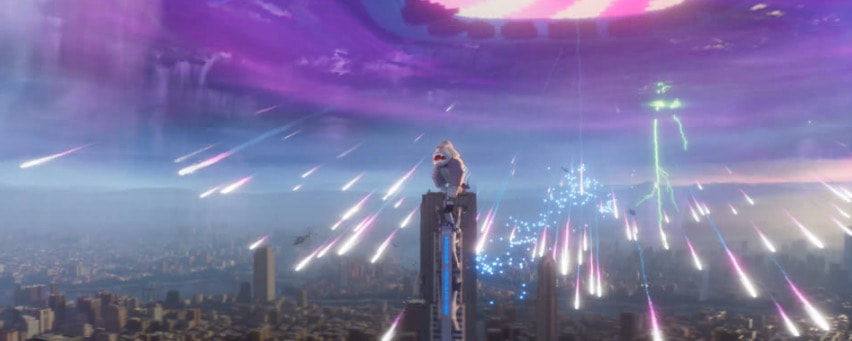
15. Biggest number of Bricks in a shot: 236,555,477 Bricks (above)
16. Number of ‘Bat’ Models made: 217 models
17. Number of shots featuring Gotham City: 523 shots (27%)
18. Number of shots featuring Brick destruction: 617 shots (31%)
19. Most used Prop: Bat Grapple Gun, 442 times
20. Biggest Crowd: 16,100 minifigs
21. How big is Gotham City?
220,831,071 BRICKS /379,095 square feet /6.6 football fields
Width: 182.09 metres | 199 yards | 597 foot
Depth: 193.48 meters | 211 yards | 635 foot
Height: 19.78 meters | 22 yards | 65 foot
22. How big is the Batcave?
50,999,853 BRICKS / 3,996 square feet
Width: 11 meters | 12 yards | 36 foot
Depth: 34 meters | 37 yards | 111 foot
Height: 11 meters | 12 yards | 36 foot
23. Number of years to render TLBM on a single CPU: over 6,550 years
- It would have needed to start rendering around the year 4,500BC, about the time the plough was becoming fashionable.
24. Number of hours to render TLBM on a single CPU: 57,418,857 hours
25. Biggest number of Lights in a shot: 21,603 Lights (above)
26. Number of Light Rays simulated by ‘Glimpse’ (Animal Logic's state-of-the-art rendering software) to render TLBM:
13,486,203,269,559,350 rays
- That’s Thirteen quadrillion, four hundred and eighty-six trillion, two hundred and three billion, two hundred and sixty--nine million, five hundred and fifty-nine thousand, three hundred and fifty!
13,486,203,269,559,350 rays
- That’s Thirteen quadrillion, four hundred and eighty-six trillion, two hundred and three billion, two hundred and sixty--nine million, five hundred and fifty-nine thousand, three hundred and fifty!
TLBM Lighting and Comp crew.
Respect!
Respect!